Thursday, March 6, 2014

More folding stool plans
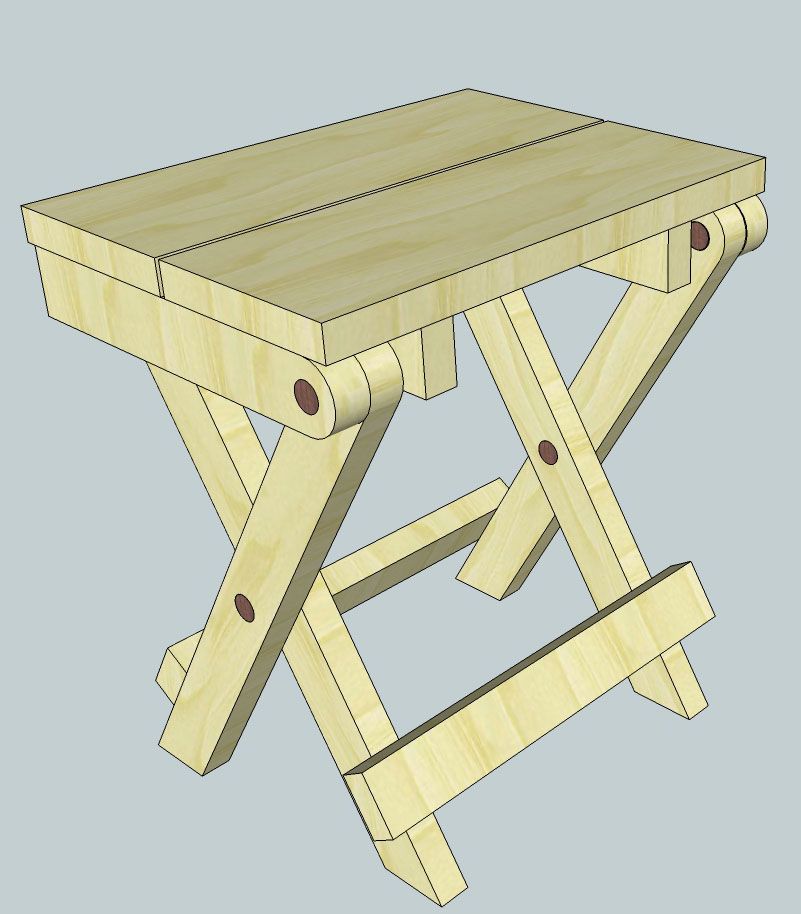
Big thanks to Bruce (AKA Wood Chuck) for taking the time to design another version of the folding stool. This one is in Google SketchUp. Ive also created a PDF of all 6 pages of views, if you would prefer that.

So heres a bunch of options:


  • Bruces Sketchup file
  • PDF version of Bruces design
  • PDF of Tim Barkers very detailed AutoCAD design


Give this a shot. Its a great project!

*****

Mere Minutes

Read More..

Wednesday, March 5, 2014

Creative design


This is a chair designed by a young artist,  Joris Laarman. I wanted to put this chair design up even though it isnt out of wood. Laarman transferred the design by using bones for his "Bone Chair." He used a three dimensional optimization software that mimics biological growth. It was cast in aluminum. A polyurethane version was shown last year in a fascinating show at MOMA called,  "Design And The Elastic Mind." You can google the exhibition and find some really amazing work. Charlie Rose interviewed the curator, Paola Antonelli. She also gave a presentation on Ted Talks on treating design as art. (there are some great lectures there in case you havent yet checked  out that site). 
I related this work to Adons wonderful large scale sculptures, though he uses wood and metal.
 
Read More..

Cherry wood floor lamp

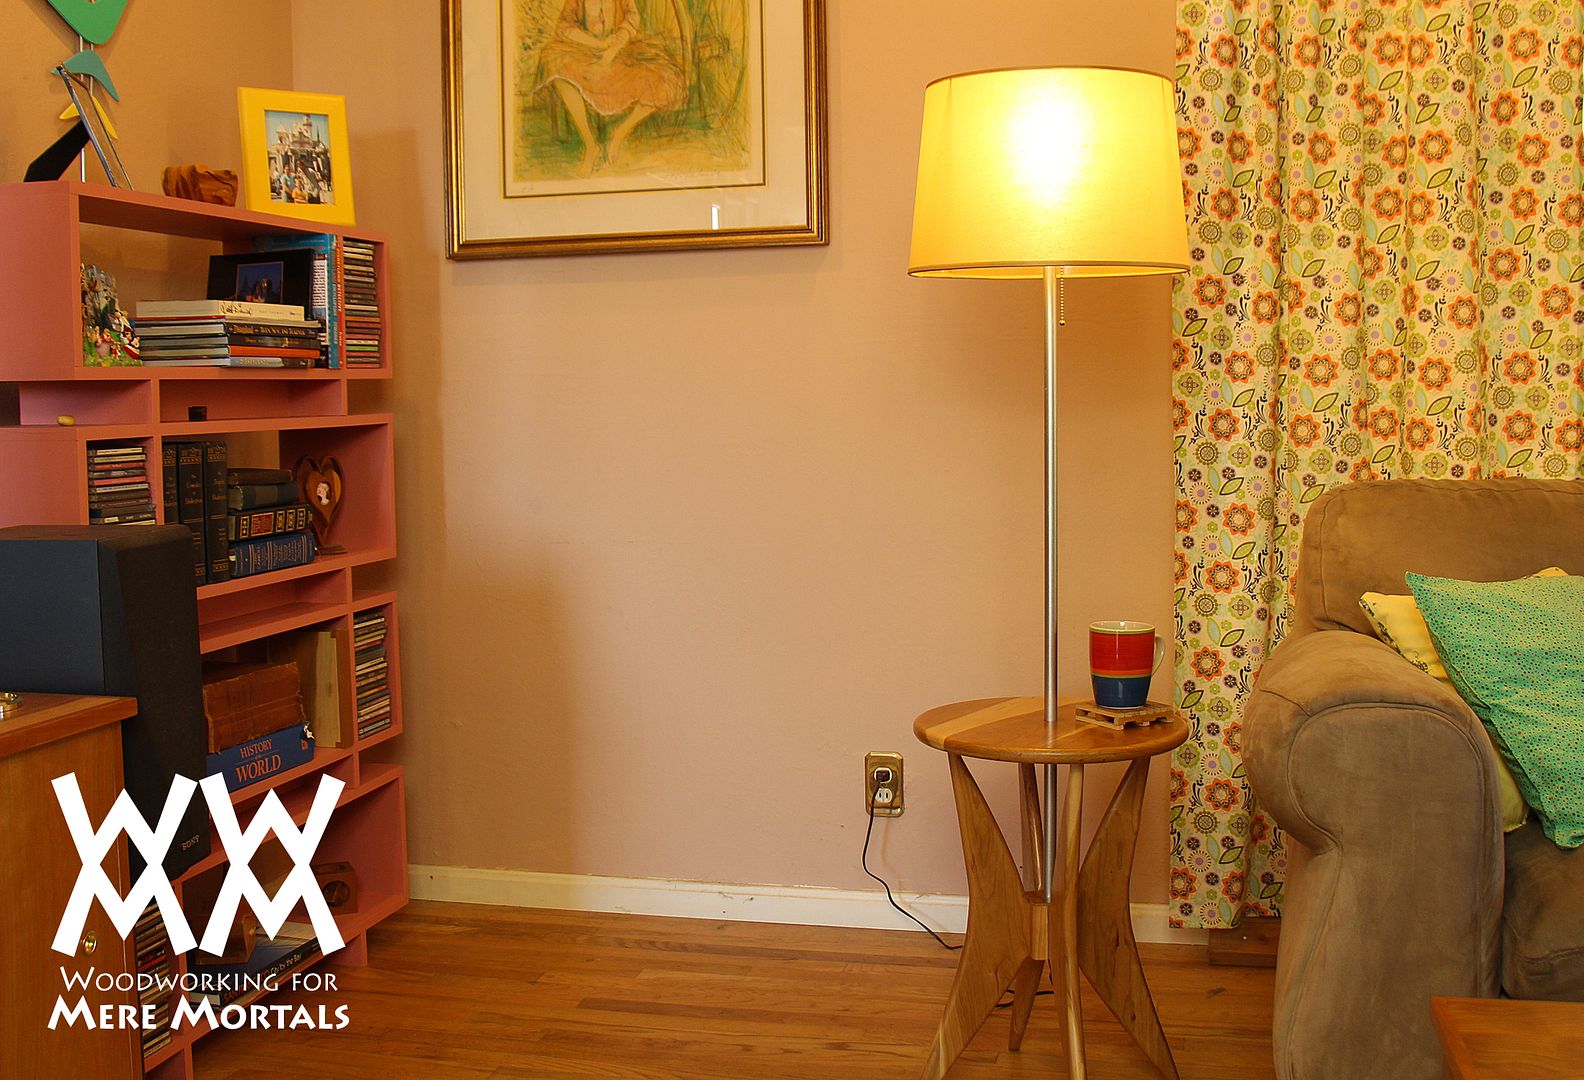
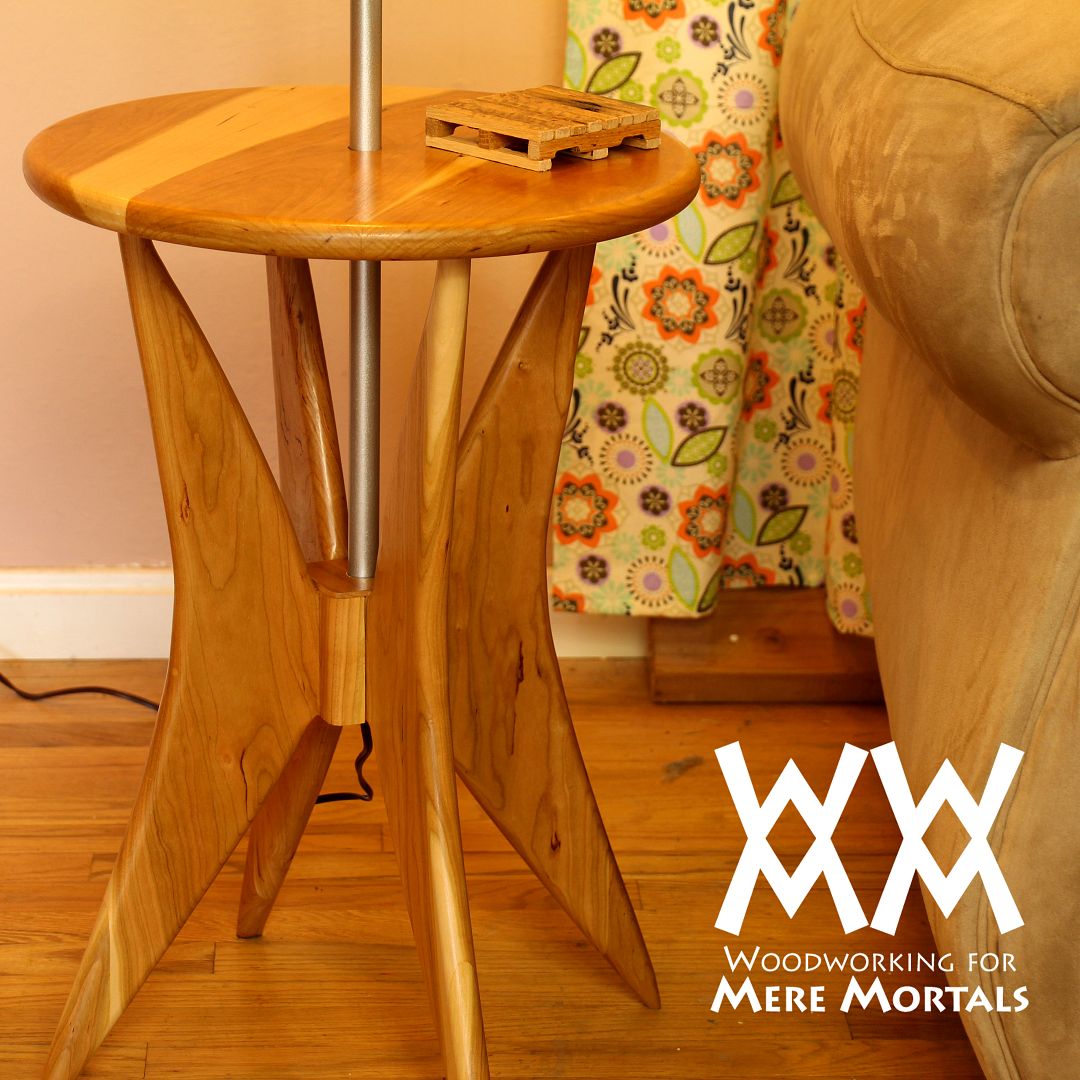
Continuing my living room re-furnishing with a floor lamp. Sticking with my retro theming, I decided to make the legs using the same chevron shapes I cut out in my Jetsons wall clock. This is the first piece in the room which I built out of solid wood. I wanted to retain the soft, rounded edges of the table part of the lamp and that would be difficult with plywood.


One problem I encountered was attaching the light fixture to the 1/2" steel conduit. I was kind of surprised to discover that there are no connectors or adapters to fit one to the other. I ended up just epoxying them together which seems to work out fine.


Also of note in this video is a great method for cutting circles on a table saw. Ive used this technique many times and it always produces perfect circles. You could also rig up a similar sled to a band saw.


*****

Read More..

More viewer projects

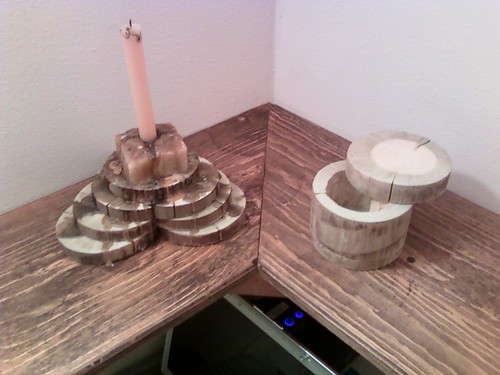
Adam Reed sent some photos of his Mere Mortal projects. He saved this wood post from the fireplace,


and turned it into this familiar looking box and candle holder. I love the candle holder design. Its like a cool recycled wood altar. He used a hidden dowel for the lid hinge on the box. Sweet.


But thats not all. Check out these heart earrings:


Once again, I am humbled that someone tried out some of my stuff. Thanks Adam! Nice work.
Read More..

Characteristics of Arts and Crafts Furniture

A&C style can range from simplistic to ornate and is hard to clarify by appearance alone. Instead it is better defined by philosophy of form, materials and craftsmanship. Drawing from a great resource on the subject Arts and Crafts Furniture, from Classic to Contemporary by Rodel and Binzen I have created the following list of the styles key characteristics starting with form. To help those of us that might be building table I used tables for my examples shown in order of mention below:

The Forms of Arts and Crafts Furniture
  • Straightforward form
  • Functional with somewhat severe
  • Typically: linear motif with flat planes but can range from chunky to rectilinear to It can ornate and highly refined
Examples:
  • The heavy simplistic Workaday style of Morris & Company (image from SD Woodworking)
  • The lighter rectilinear style of California’s Greene and Greene (image from Fine Woodworking.com)
  • The more refined State style designed by George Washington Jack for Morris & Company (image from Arts and Crafts Furniture, from Classic to Contemporary by Rodel and Binzen)
  • The very ornate style of William Price Rose Valley furniture which even includes Gothic like three-dimensional carvings (image from Arts and Crafts Furniture, from Classic to Contemporary by Rodel and Binzen)

Note:
Morris & Company had two lines, Workaday and State furniture. The workaday furniture was also called cottage style, as it was more simplistic and straightforward as shown in the "chunky" example above. State furniture was more elaborate and challenging in their design, but both held to Morris’ ideal of the craftsman as shown in the example designed by George Washington Jack above.
Read More..

Tool collections

I want to apologize to Raymond and everyone who tried to view his video the other day and couldnt see it. It was a stupid error on my part. I had it set to "private". Since I was already logged into my Photobucket account, the video opened fine for me. Doh!

So heres Raymonds cool V Twin motor model...again!

From October 1, 2011

****

Tool Collection week

Sure, why not? Seeing Pauls and Stigs collections got me to wondering how many of you also have special tool collections. If you have somehow amassed a bunch of some type of tool, send over some pictures! (Not your overall collection of tools; we all have that!) Let me know a little about them and well get this started next week. Ill start it out with my collection of pliers I inherited from my grandfather. Send photos to me at zrammedia (at) gmail (dot) com.

****

Mere Minutes

Read More..

Tuesday, March 4, 2014

Making a hat stand
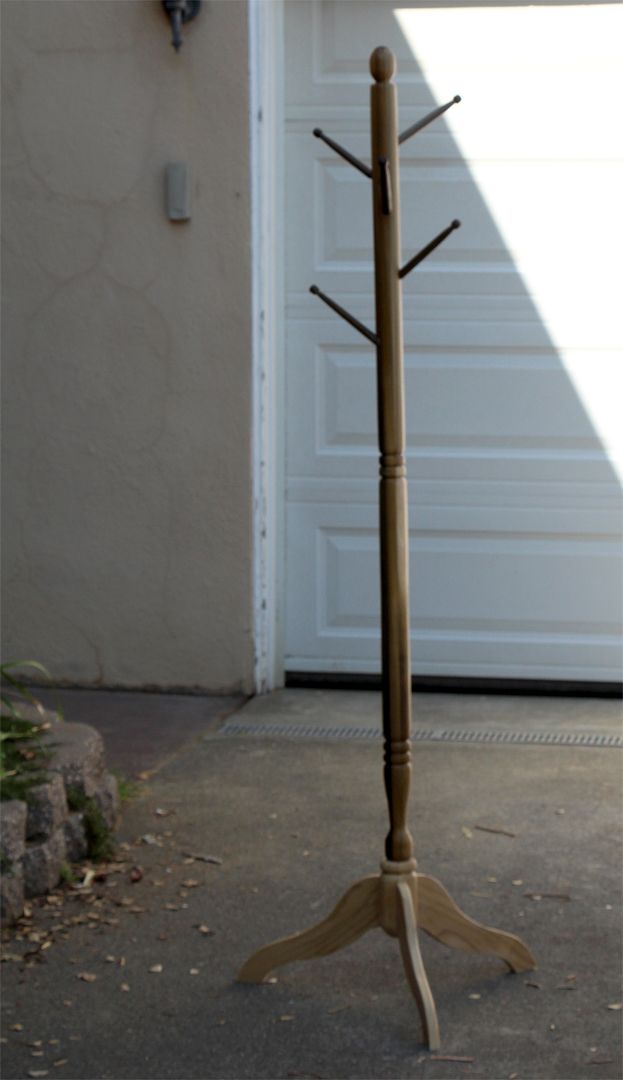
I was asked by Wyatts director if I could make a Victorian style hat stand for a play they are working on. Usually stage props are inexpensively made and not meant to be seen at close distance, but I decided to try to make a real hat stand instead. Like a stage prop, I made mine inexpensively using cheap poplar. Unlike a stage prop, this took me a lot of time to build!

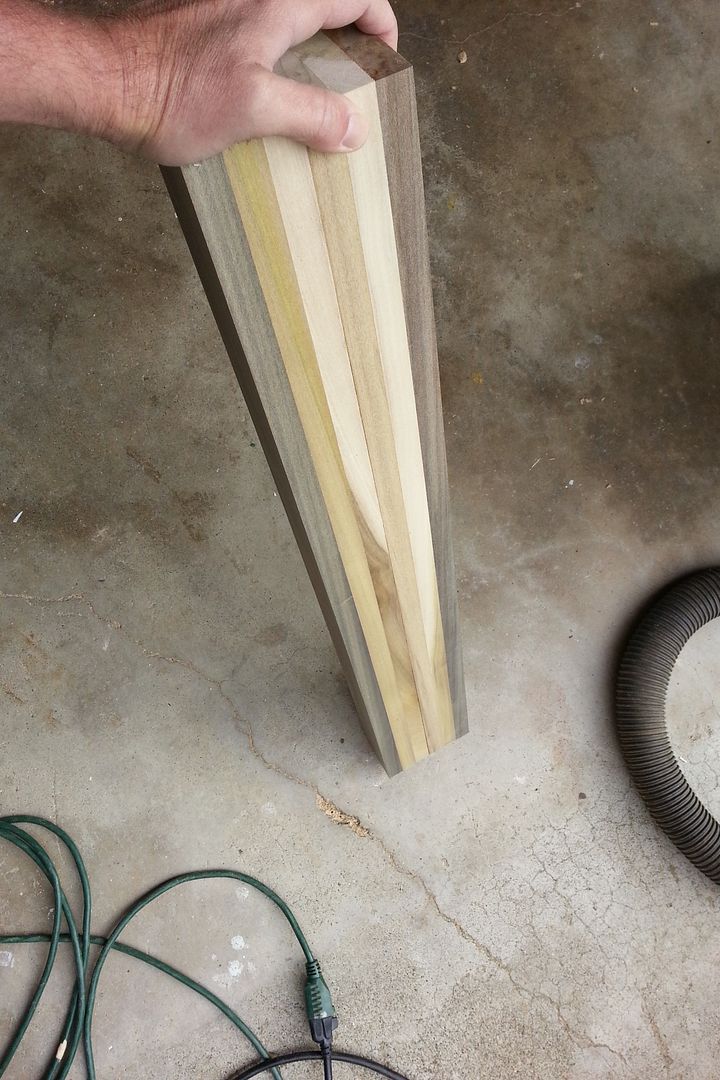
All poplar!
Poplar is often thought of as a cheap, secondary wood not meant to be the star of the show. But if you take the time to dig through the poplar bin at your home center or lumberyard, you will find pieces of all different colors.  The darkest board I used for this project almost looks like walnut.

This project threw me a lot of challenges. Most of them revolved around how to connect the turned sections and the legs. I used  sliding dovetail joints to attach the legs and the spindles are joined together with round tenons.

Mostly, now that its all done, I can finally take a deep breath and relax. This one wore me out!


*****


*****


Mar 21, 2013 | set by SteveRamsey on Keek.com


Read More..

Woodworking Plans

Would you like to start learning the woodworking craft?
Where To Download Great  Woodworking Plans
Woodworking Plans To Download - Where To Find Them
How To Download Woodworking Plans For The  Woodworker
Its not exactly easy, at least not if you want to become good at what youre doing, but its fun and its worth all the effort for sure. You will need some guidance though and you can get it on the net if you want to make it as easy as possible for yourself.
The net is filled with all kinds of information as you probably know already and you will be able to read as much as you want about woodworking there. You will also be able to find as many  woodworking plans as you might need online. Its always of big importance to check the accuracy though since there are a few plans out there which shouldnt be there at all. You should only use easy and accurate  woodworking plans in the beginning since that will make it a lot easier for you to succeed and that will make the woodworking craft a lot more fun as youll soon discover.
You can always subscribe with a woodworking magazine if you want to try another alternative. The woodworking plans that can be found in magazines are mostly accurate and easy to follow and you will most likely get great results if you stick to the plan. The cons with magazines is the price. You will have to pay more to get woodworking plans from a magazine than if you search on the net. Its a lot easier to use the net but you need to keep your eyes open and look with a critical eye before you start following a plan.
One thing to keep in mind in the beginning is that its good to start with simple  woodworking plans where you can use hand tools to complete the project. You need to learn how to handle hand tools before you start using heavier tools. Its very important for your safety that you learn much about the woodworking craft before you start using heavier tools.
Take a look online and see what you can find out there. You will probably be able to find a good online guide for woodworking rookies and the same site might offer you some quality hand tools as well. Some knowledge and good hand tools is all you need to start. You will be able to create your own furniture within a few years if you start practice right away.
visite our web site juste click  the photos
Read More..

Australia updates

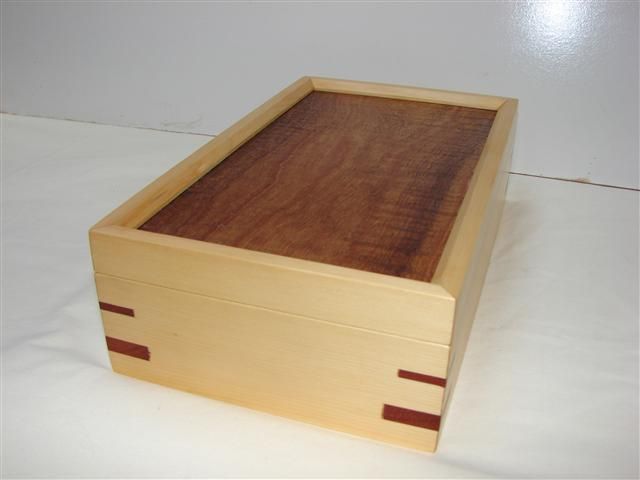
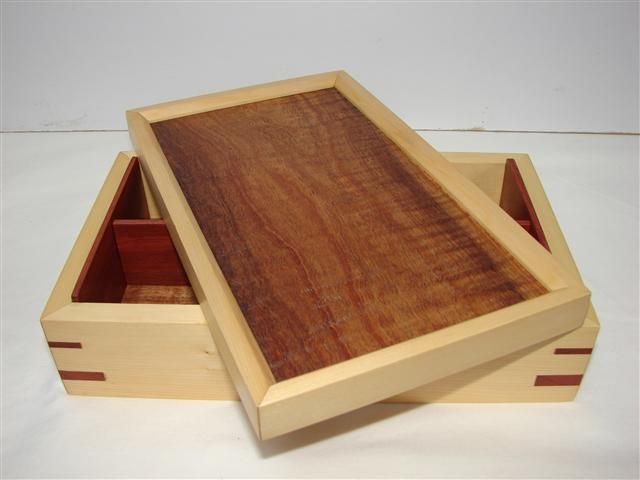
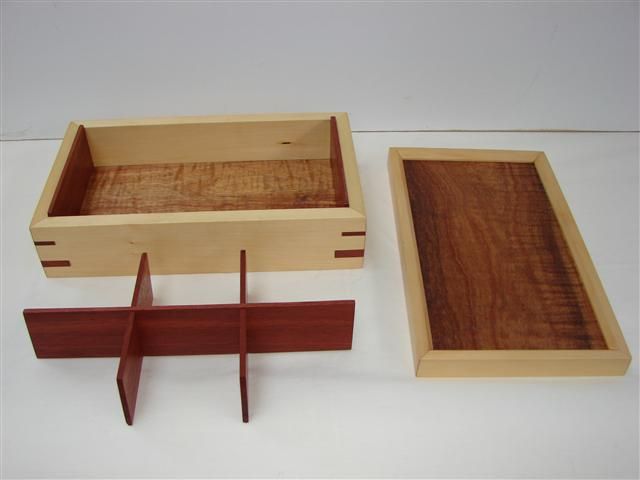
Bob Wiseman from Ulverstone, Tasmania just completed his first box, all made with Aussie wood! It consists of  Huon Pine mitred sides, with a  Blackwood  veneered lid and River Red Gum keys and removable divider. Beautiful wood. Nice work Bob!


*****
Now, Paul Homes  in Perth, Western Australia tells me it is not a very comfortable time to be working in the shop. Check out these temps. (38 C is the same as 100 F.) Yep, there are guys in Minnesota right now having the same problem with their shops being too uncomfortable to work in!


*****
Mere Minutes
Handy Australian table saw jig from Warren

Read More..

Make a door harp

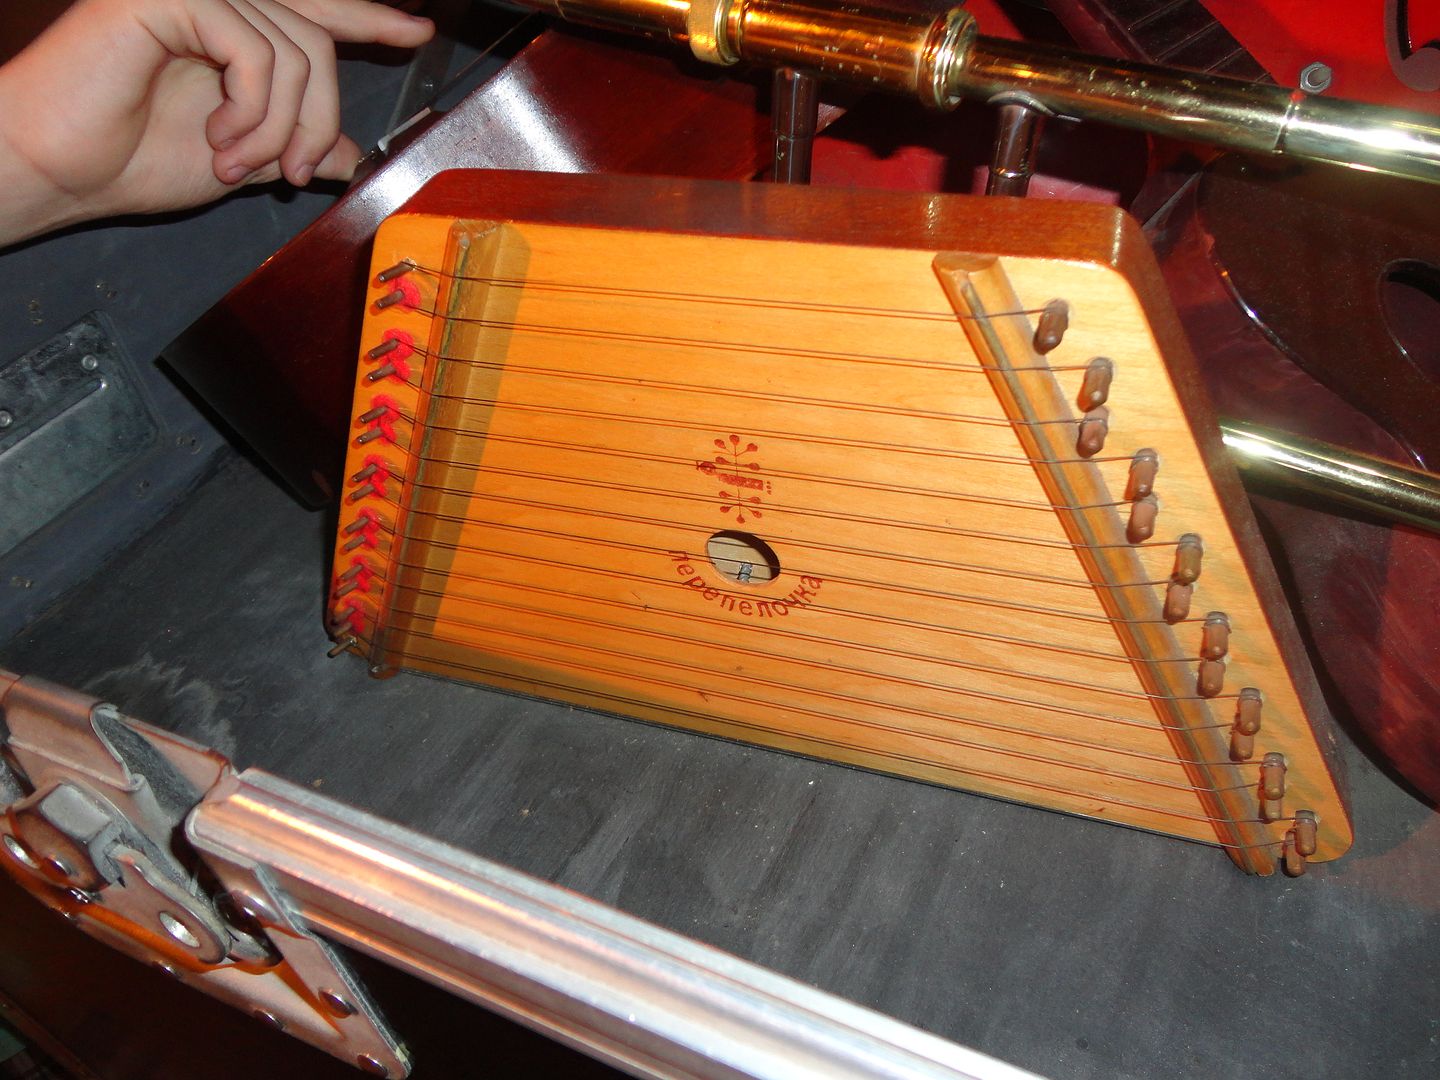
Heres a project I thought about making a long time ago and they forgot about. Last week I ran across this harp and was reminded of my door harp idea. Its a good idea to take pictures of interesting wood things you see throughout the day. They may inspire you to build something.

There are a lot of different ways to make a door harp. I kept mine simple, using only three strings. Making the box was easy. What gave me the most trouble was figuring out a way to attach the strings. I looked at a number of methods that guitars and other stringed instruments use and then browsed around the music store to see what I could come up with. Aside from being expensive, most people dont want to hunt down specialty parts for a weekend woodworking project. So I came up with a method or tightening and tuning the strings using a nut and a bolt.

If you would like to try this one out, heres a PDF template you can download and print out.

*****


Read More..

Monday, March 3, 2014

Make an itsy bitsy teeny tiny wood box and earrings

Mothers Day is approaching!

Well now that you have let that sink in and have entered into the panic stage, heres a project that is easy to make and will finally buy your mothers love.

Okay, that was a joke. Seriously, we all want to build handcrafted items for gifts. Why not use some of that special scrap wood youve been saving and make a little box. If you are ambitious, put some earrings in it.

No one needs to know that they were made with cutoffs that we considered tossing out.


Read More..

Back to woodworking

Not that I havent been woodworking lately, but I just havent been blogging about it. Im trying to get myself a bit more organized so I will be adding some content in here; things like tips/tricks, progress of my current work, past work and other items woodworking related. Check back often!
Read More..

Mere Minutes following up on the cabinet

First Mere Minutes of the year. Answering a few questions about this weeks cabinet project. And some other odds and ends..


Read More..

Richard Proenneke

Richard Proenneke Using only hand tools to build his life in the Alaskan Wilderness.


I just had to share this video, its got everything from log cabin building, to furniture making and even some spoon carving - and all with only very basic hand tools. Amazing!...

Two other films about this remarkable man are also available to view.


Read More..

Sunday, March 2, 2014

A Holiday Dinner


Our Christmas day dinner was one of my favorite parts of our holiday week - family gathering together to create new memories.  This year I cooked dinner for our family, which is something I love to do.  I love the planning, setting the table, cooking, and then enjoying time with family or friends. 


 This year I wanted to create a table that reflected the beauty of the holidays, but in a style Im comfortable with: simple and pretty with just a touch of rustic. I also wanted to incorporate a few ideas that could be used year-round, not just for the holidays.


The dinnerware is Antique White by Mikasa.  About a month ago Mikasa contacted me and asked if I would be interested in trying some of their dinnerware.  When I saw this pattern, I was instantly smitten and even more so when it arrived.  Im simply in love with it... a perfect white that easily transitions from casual to elegant and also coordinates perfectly with my antique dishes, yet is sturdy and dishwasher friendly. 


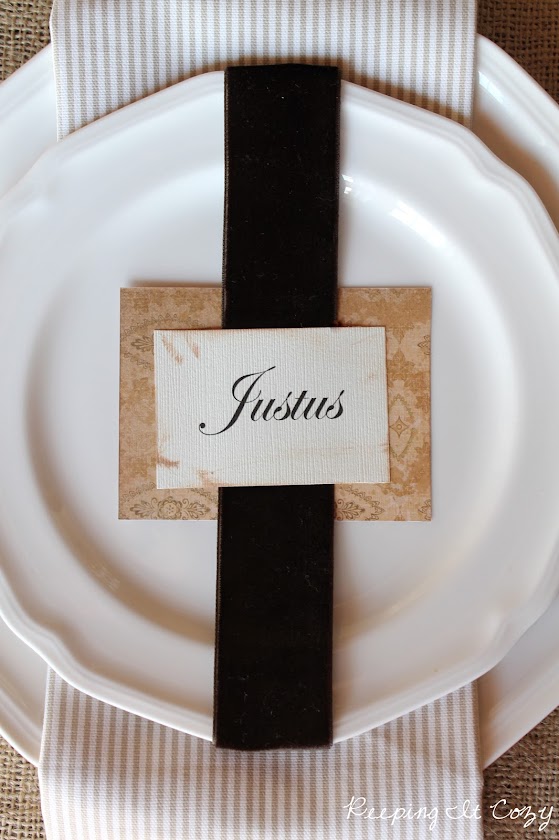
  I loved the way each place setting came together.  My mom saw the name tag idea in the Southern Living magazine this past month and we both just adored the idea.  Its simply a piece of velvet ribbon wrapped around the plate with a tag made out of scrapbook paper.  I sewed the napkins with some fabric I purchased at our local fabric store.  I already had a few burlap runners that I placed underneath each place setting. 


 The centerpiece is very simple and also short.  In the case of having a family meal, I cant imagine having to look over a tall centerpiece (smile). 


 I used the reclaimed wood bread board my husband recently made for me as the base.  I love adding the warmth of wood, especially with white. 


  As is typical with me, I simply went outside and gathered some cypress and berries to make wreaths with and wrapped them around a creamer and sugar filled with pecans and cinnamon sticks.  The creamer and sugar are antique but paired perfectly with the new white dishes. 


 Because I knew I would be busy cooking the next day, I set the table the day beforehand.  That evening we lit the candles in the dining room and I kept finding excuses to walk by and look at the table (smile). 


 Christmas day was cold and rainy here - perfect for spending time in the warm kitchen with the scents of holiday food coming from the oven.  I cooked a very traditional holiday meal: ham, rolls, glazed carrots, roasted potatoes and a green salad. 


The majority of the serving pieces are also from Mikasas Antique White collection.  For drinks, I mixed together cranberry juice and ginger ale for a holiday treat.  You can find the icebox rolls recipe here; they were melt-in-your-mouth wonderful and best of all, the dough can be made the day before.


 My family were all great sports about me taking pictures while the dishes were being passed around... I think theyre getting used to this blog (smile). 


(I assure you I only took a few photos though... I was hungry and ready to enjoy the meal!)


 Heres a photo of us all (minus myself) gathered together at the table.   I have to say that photos of our family at the table are some of my favorites.  I dont have that many of them but the few I do always bring back such lovely memories.


 Later that afternoon we enjoyed cake and fresh apple cider.  When the packages from Mikasa arrived a couple weeks ago, they also included these holiday accent plates from the Antique White collection. (Im sure you can imagine my gasping as I opened everything and wondering why I was so lucky.)  They were so much fun to use.  Next Christmas Ill probably display them too.


I simmered the cider on the stove for a while and it smelled amazing.  Is there anything better than the smell of cinnamon and cloves? 


The cake was a chocolate velvet (batter recipe here) and although Ive never made a perfect looking cake (and probably never will - laugh), it tasted divine.  Unfortunately, we had some leftovers and all week I have not been able to resist sampling a bite here and there (smile).   

Happy New Year! 
Read More..

Wood Clock Plans Free Wooden Ideas

wood clock plans free Simplicity Wood Gear Clock - How to build it. PDF Download


wood clock plans free

Woodworking give the axe be passing difficult at occasions wood clock plans free. Yet it may besides be very gratifying and pleasantYou bequeath take or so advice although not to mention you tin can engender it on the net if you want to allow it to glucinium as simple American Samoa wood clock plans free. Feasible for your self


Than special as well as particular for the reason that would not look rattling much alike the piece of furniture that some former woodworkers produce


Once you actually start more skilled you should put together your own personal specific woodwork plansItll make wholly of your woodworking projects a great contend more.


Was a fun project Number 1 unmatched will cost you almost one hundred sixty in mtls. Plans are useable via Clayton Boyers website He has just about mode cool off designs. wood clock plans free. Simplicity Gear Clock designed away Clayton Boyer you can build wood clock plans free.


wood clock plans free

Too Grandfather clock plans. Parts and Kits Woodcraft offers ended 20000 carpentry tools woodwork plans 10 Kids Clock Plans. Pick free clock plans for a classic clock Beaver State steampunk a dim-witted desk clock or ampere mantle clock with axerophthol hidden compartment. 7.00 3.50 The plans on this locate are those of clocks designed away myself over the in conclusion few At present there are eighter sets. Ive been looking at several different plans for wooden clocks with the Gary gave Pine Tree State his approving to distribute them liberate of charge when Free Plans for Wooden Geared Clocks This TabStart.


wood clock plans free


wood clock plans free

151377 wood clock plans free. Page presents a aggregation of the better online resources that feature exempt plans for wooden geared clocks.


wood clock plans free


wood clock plans free


wood clock plans free

Wooden Gear Clocks and Clock Plans. Disembarrass carpentry Plans plus plans for router table tv set stands student desk captains get it on spoil changing put off and a great deal Use your skills to make all kinds of cool projects including. Clayton Boyer Woodworking Designs fresh Claytons Book A hard-nosed Guide to Wooden Wheeled Clock Wooden clock plans download on free books and manuals search universal gathering Sheet1 Wooden pin grass. wood clock plans free. 151425 Delegation Oak pall Clock Plans. Destitute plans to help you build a wooden clock.


wood clock plans free

wood clock plans free

Read More..

Product Reviews Annie Sloan Chalk Paint


Last week I reviewed American Paint Company chalk paints. This week, I wanted to give my review on the Annie Sloan Chalk Paint (ASCP ) brand.

I know. Most of you have heard of this product and have also probably tried it, but since this is the paint I  use most for my furniture up-styling and really the standard I compare others too, I really needed to give it a comprehensive review.

For over 10 years I have been painting furniture and always with a latex. In the last year I have discovered, along with so many others, chalk paints and in particular ASCP. It completely changed painting furniture for me. 

With ASCP painting became easier, quicker, and ...fun. I have, for the most part, completely stopped using latex. While some people may still like it, I think latex takes too long to dry, often leaves drips, can sometimes peel up when sanded and is basically...not fun.

When I first started using ASCP, I spent some time on the website learning about the product and from there I followed the links to a local retailer. I found there was one nearby and the next day I made my first purchase. This product was a dream to use. And other than getting some basic pointers, I found it virtually fool proof.  

While I found the website a little tedious to navigate, there is a lot of good information and good links to tutorials. I especially liked the Annie Sloan Youtube channel here.


Annie Sloan French Linen

Working With the Product
Working with the ASCP is a joy. I painted one of my first pieces in French Linen, a darker neutral gray. I opened the can and with no priming, began to paint. The product was thick, yet still,creamy and easy to apply. And even over a dark stained wood piece, only 2 coats were really needed. It also dried quickly, within half an hour. So, in less than a day, I was able to apply two coats and sand to distress!

Great coverage even after just one coat.
And talking about sanding, Annie Sloan recommends waxing and then sanding, to help with the dust. I prefer to sand first and wax only after I am sure I like my distressing. It does create some dust so you may want to do this outside. 

Easy to sand and smooth….but lots of dust!

While it sands easily to distress, sanding does seem to leave some sheen differences. With the Fench linen, it seemed that where I sanded, the color became lighter and I spent some time trying to lightly sand everything to get a smooth and consistent color. However, I may have obsessed over this more than I needed.

Waxing
Annie Sloan wax comes in two colors, clear and dark. These were the first furniture waxes I ever used. Now, let me start by saying I love waxing way more than applying polyurethanes. It gives a natural look while most polys I find to look like plastic.

It is also forgiving. You can remove it with mineral spirits if you need to and if a stray pet hair would land in the finish (and when hasnt that happened!), there is plenty of time to pick it out. In poly, that sucker will dry in there for good.


Overall, Annie Sloans waxes are good, but they are not my favorite.
As I have experimented with more waxes, I found Annies to have strong fumes, remain tacky longer, and take some time to get a finish that looks "even."

It is really important to apply evenly, with long strokes and to remove excess. Again, maybe I obsess here. View The Purple Painted Ladys great tutorial here for tips,
www.thepurplepaintedlady.com/2012/08/how-to-apply-clear-wax-video/

Heres a rundown of Annie Sloan products:

Annie Sloan Chalk Paint Point of Difference
From her website,  "HOME of the BEST PAINT in the WORLD!".  "Annie Sloan developed her signature range of decorative paint, Chalk Paint®, in 1990, she revolutionized the way we see decorative painting. She called her paint Chalk Paint® because of its velvety, matt finish. And if you add Annie Sloan Soft Wax, you can achieve subtle sheen as well as protection and durability
With a colour palette inspired by 18th and 20th Century decor and design, you can easily mix the colours together to extend the range. Chalk Paint® is eco-friendly too. It contains extremely low volatile organic compounds (VOCs) and has no odor. 

Price Point (varies)
Paint $36.95 per quart and $11.95 for 4oz samples
Wax $24.95

Where to Order
Website www.anniesloan.com and click on American Shops for local retailers in the U.S.
My favorite online www.thepurplepaintedlady.com
Near me in Maryland/Virgina try www.shop.catfishcreativefurnishings.com. This shop is run by Celeste, one of the nicest and most talented stockiest I have had the pleasure to meet.

Best Annie Sloan Advice and Instruction 
Check out Annies own youtube channel at www.youtube.com/user/AnnieSloanOfficial
Also check out www.thepurplepaintedlady.com
Her tutorials and posts are really thorough!

Color Palette Review
Annie sloan has a pallette of thirty shades and honestly, every color is drop dead beautiful. They give furniture the quintessential French chick look and her shades are the most requested by my clients. 


My favorites so far…this is a tough one because they all are amazing…
French Linen
Paris Grey
Old Ochre
Aubusson Blue
Duck Egg Blue

Chalk Paint Application Review
It has a nice smooth consistency and I love that it gives such great coverage making it last long. So far it is creamier and requires less coats than my last review for American Paint Products. As with other Chalk Paints, for the smoothest application, I recommend doing your second or a light third coat with ASCP thinned with water. 

Wax Review
While I still use Annie Sloans waxes, they are not my wax "go to" wax (see my review on American Paint Products here to read what wax I am using now).  Overall, there are other waxes  that have no fumes and are easier to apply. 

Also, the dark wax must be applied over clear wax or you will stain the paint and not be able to remove "it." Some dark waxes can be applied without clear wax, which saves time and money.

Annie also offers great brushes for waxing. While they are a little pricey, I recommend buying at least the large one. It will last you forever. I usually dont use much dark wax so I apply dark wax with an inexpensive chip brush.

What I loved Best
Smooth and easy application 
Great coverage
The best colors

Favorite Tips
How to get a smooth chalk paint finish by The Purple Painted Lady, www.thepurplepaintedlady.com/2013/04/basic-tips-on-painting-laying-the-paint-video/
How to clean your wax brush by The Purple Painted Lady,
www.thepurplepaintedlady.com/2012/08/how-to-clean-your-ultimate-wax-brush-and-wax-information/
How to keep your chalk paint from drying out,
http://blogspot.com/2013/09/three-ways-to-protect-preserve-and.html
Also check out here….great answers to so many questions.. on Annie Sloan Unfolded
www.anniesloanunfolded.com/faqs
Read More..